Summary

Learn how to build a live character counter for a text box in React. This beginner-friendly tutorial includes code, step-by-step explanation, and best practices for React developers.

Article Body

How to Build a Real-Time Character Counter in React – Beginner Friendly Guide

📝 Create a Live Character Counter for a Text Box in React

A character counter is a simple but useful feature that helps users know how many characters they’ve typed in a textbox or textarea—especially when there's a limit. This is commonly seen on platforms like Twitter or Instagram.

In this tutorial, you’ll learn how to create a live character counter using React from scratch. This is a great mini project if you’re learning React or looking for a beginner-friendly component to add to your apps.


🚀 What We Will Build

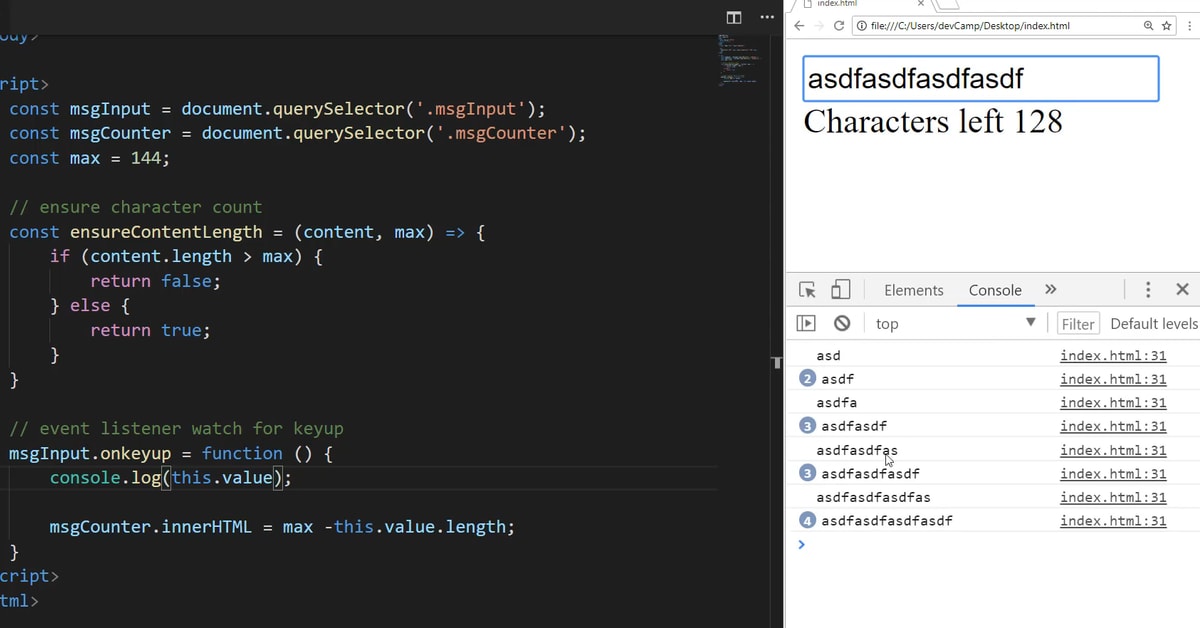
We will create a React component that includes:

  • A textarea input.

  • A live counter that updates as you type.

  • A maximum character limit.

  • A warning when the character limit is reached.


🛠️ Step-by-Step Guide

Step 1: Set Up a React App

If you don’t have a React app already, create one using:

npx create-react-app character-counter
cd character-counter
npm start

This sets up a new React project using Create React App.


Step 2: Create the Character Counter Component

Inside the src folder, create a new file: CharacterCounter.js

// CharacterCounter.js
import React, { useState } from 'react';
import './CharacterCounter.css'; // Optional styling

const CharacterCounter = () => {
  const [text, setText] = useState('');
  const maxLimit = 200;

  const handleChange = (e) => {
    setText(e.target.value);
  };

  return (
    <div className="character-counter-container">
      <h2>Live Character Counter</h2>
      <textarea
        value={text}
        onChange={handleChange}
        maxLength={maxLimit}
        placeholder="Type your message here..."
        rows="6"
        cols="50"
      />
      <div className={`counter ${text.length === maxLimit ? 'limit-reached' : ''}`}>
        {text.length}/{maxLimit} characters
      </div>
    </div>
  );
};

export default CharacterCounter;

Step 3: Add Some Styling (Optional but Recommended)

Create a file: CharacterCounter.css

.character-counter-container {
  width: 100%;
  max-width: 600px;
  margin: 40px auto;
  text-align: center;
  font-family: Arial, sans-serif;
}

textarea {
  width: 100%;
  padding: 10px;
  font-size: 1rem;
  box-sizing: border-box;
  border-radius: 5px;
  border: 1px solid #ccc;
}

.counter {
  margin-top: 10px;
  font-size: 0.9rem;
  color: #555;
}

.limit-reached {
  color: red;
  font-weight: bold;
}

Step 4: Use the Component in App.js

Update your App.js to render the component:

// App.js
import React from 'react';
import CharacterCounter from './CharacterCounter';

function App() {
  return (
    <div className="App">
      <CharacterCounter />
    </div>
  );
}

export default App;

📘 Explanation – What’s Happening Here?

Let’s break it down step by step:

useState

const [text, setText] = useState('');
  • text: current value of the textarea.

  • setText: function to update the value.

  • Initially, it’s an empty string.


handleChange Function

const handleChange = (e) => {
  setText(e.target.value);
};
  • Triggered when the user types.

  • e.target.value is the current content of the textarea.

  • It updates the text state.


maxLength Attribute

<textarea maxLength={maxLimit} />
  • Prevents users from typing more than the allowed number of characters (200 in this case).

  • It's a built-in HTML attribute.


✅ Live Character Display

{text.length}/{maxLimit} characters
Displays how many characters the user has typed.

Automatically updates with every keystroke due to React’s state re-rendering.

✅ Conditional Styling
className={`counter ${text.length === maxLimit ? 'limit-reached' : ''}`}
  • If the limit is reached, we add the limit-reached class.

  • That class turns the counter red to warn the user.


💡 Bonus: Prevent Pasting Over Limit (Optional)

Even though maxLength handles typing, you can also prevent pasting more than the limit like this:

const handleChange = (e) => {
  const input = e.target.value;
  if (input.length <= maxLimit) {
    setText(input);
  }
};

This ensures users can't bypass the limit by pasting text.


✅ Final Folder Structure

/src
  ├── App.js
  ├── CharacterCounter.js
  ├── CharacterCounter.css
  └── index.js

🎯 Why This Is Useful

  • Great for forms, feedback, or messaging UIs.

  • Useful when APIs or databases restrict the character count.

  • Easy to extend with word counters, validation, or even emoji support.


🔚 Conclusion

Congratulations! You’ve now built a fully functional live character counter in React. This mini project is a great way to practice React fundamentals like state, events, and props.

You can expand this further by:

  • Adding a word counter.

  • Enabling a submit button only if within limit.

  • Showing remaining characters instead of used.